In today's digital age, it is not easy for any business to work without personalization. Especially for those in the retail or consumer market, personalization has now become the fundamental aspect of their branding. It improves the customer’s experience and helps drive sales. Personalization increases the customer loyalty when you suggest them something of their interests. Let's start building the model for the similar experience for our customers.
In our last post, we talked about the basic concepts of Azure Personalizer and how you can build your own library (or use mine). In this post, we will try to build a simulator which is going to train our Personalizer model so that we can then use it in our actual apps, bots or the websites.
 You can argue that it was too simple to put and there are not many variations in the suggestions. I agree and the reason behind it was to make it simple so that people who are starting it for the first time can understand well.
The simulator will randomly pick-up the context features and send it to the Rank API. Once it receives a reward, our code will determine that actual award against a particular occasion and variety. If the determined award is same as the award returned by the Rank API, then it is sent as 1 into the Reward API with an event ID.
You can argue that it was too simple to put and there are not many variations in the suggestions. I agree and the reason behind it was to make it simple so that people who are starting it for the first time can understand well.
The simulator will randomly pick-up the context features and send it to the Rank API. Once it receives a reward, our code will determine that actual award against a particular occasion and variety. If the determined award is same as the award returned by the Rank API, then it is sent as 1 into the Reward API with an event ID.
 It also contains the code to get the response for the simulated action. Instead of explaining the basic code line by line, here you go with all the class:
What do I need?
If you're not using the existing library which I have shared or you just want to copy it, then you may need a .NET SDK for Personalizer.In my Personalizer Library, I am using the preview version of the .NET SDK
Simulator
Let's say you own an app that lets people buy paintings of their choice. The app contains thousands of paintings of all sorts, ranging from pets to landscape to streets and so on. You integrate Personalizer in this app so that your customers can start seeing the relevant paintings. You may have to do this by fetching the right category of paintings. Every time a painting is shown to the user, the Rank and Reward calls are made to the Personalizer to learn and improve. However, the above discussed process is quite tedious. It can take weeks if not months before Personalizer starts suggesting the right action. Therefore, we need a way to train the Personalizer faster and the constructive way to achieve this, is by creating the Simulator.Just to highlight that actual actions are already defined in the PersonalizeLibrary code.
Personalized Desserts
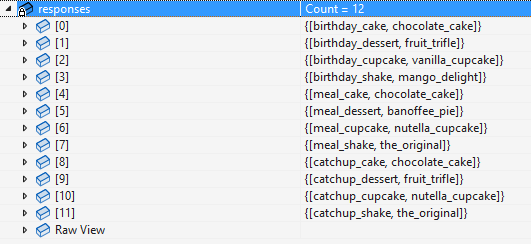
Let's understand the basic goal or objective we're trying to achieve in this simulator. Our business problem resolves around the Personalized desserts. For example, if someone wants to go to abirthday party but that person wants to take cupcakes for their friends then it'd be vanilla cupcakes. However, if someone wants to go just for the catch-up or a meal and wants to take the cupcakes with them then it'd be nutella cupcakes.
This means that based upon the different occasions and varieties, a specific dessert will be suggested as the top action. Below is a simple depiction of how it would look like:
You can argue that it was too simple to put and there are not many variations in the suggestions. I agree and the reason behind it was to make it simple so that people who are starting it for the first time can understand well.
The simulator will randomly pick-up the context features and send it to the Rank API. Once it receives a reward, our code will determine that actual award against a particular occasion and variety. If the determined award is same as the award returned by the Rank API, then it is sent as 1 into the Reward API with an event ID.
In our previous post, we have discussed briefly that your reward can be anything between 0 and 1.
UserSimulator.cs
In this class, we will just set-up the possible combinations as defined above. These will be stored as a part of dictionary where we will have a format ofocassion_variety as a key, whereas possible action ID as a value. This is how it is going to look like:
It also contains the code to get the response for the simulated action. Instead of explaining the basic code line by line, here you go with all the class:
Simulator.cs
In this class, we're going to setup ouroccassion and variety values so that we can simulate the context randomly. Once we get the randomized combination of the context, we then pass it to the Rank API. The response of the rank API is then stored in custom class called PersonalizerResponse which is a part of PersonalizerLibrary. If the returned response matches the response of the simulated context, then a reward of 1 is sent back to Reward API.
Note that SimulateEvents function is called from outside (such as Program.cs) so that it can run for N number of times to train the model.
In our previous post, we've kept our Model Update Frequency in Azure setting as 5 minutesOnce you start running the simulator, you may see that it will give you return random responses. This goes back to our topic of explore vs. exploitation I discussed in my previous post. [iheu_ultimate_oxi id="1"] In the start, you may experience very random responses, but you will notice the improvement in your model later on. [iheu_ultimate_oxi id="2"] I noticed that whenever you run around 500-1000 requests, you may need to wait a little more (not just 5 minutes as defined above) to see the improvement of the trained model. This will also show you an increase in the reward count at the later stages. So, that's one of the ways to create a Simulator so that when you can test your application's behaviors. This is clearly not a way to push it for production and then later train on that data as it will have a bunch of false results all the time, unless you're using an Apprentice Mode. It is a topic of some other day 🙂 Personalised experiences add more value to the overall experience than adding half-baked features into your solutions. In our next post, we'll be looking at the applications of the Personaliser. Primarily, our focus will be on the integration of Personalizer with either a web app, mobile or a chat bot. Until next time.